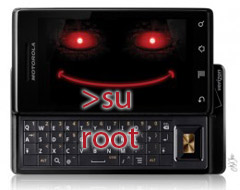
Tehre were lots of discussions and panic over the fact that Motorola has locked the Droid X from any custom ROM loading, and customizations. As of now, it is confirmed that Droid X is officially rooted with instructions also surfacing simultaneously. The credit for this root goes to super moderator at Droid X Forums, B16.
Warning: Please use this method at your own risk. No one would be held responsible if you end up with a bricked device. A guided video would attempt to help you in every way possible.
How to Root Motorola Droid X [Video]
Here are the step by step instruction for rooting your Motorola Droid X.
- Download the attached archive and expand it to a folder you can find (eg. c:\DroidXRoot_v2)
- Set up ADB (Step-by-step guide for Windows Vista/7
- On the phone: Home, Menu Button, Settings, Applications, Development: Make sure the “USB debugging” option is enabled/checked.
- Status bar, USB connection: Make sure “PC Mode” is selected.
- Open a command prompt (Windows: Start, Run, “cmd”, OK; Linux: Terminal)
- Run “adb devices”. If you don’t see your device listed under “List of devices attached”, return to step 2 and follow the link to setup ADB (use that topic for support) and return here when “adb devices” lists your X.
- Run “CD c:\DroidXRoot” (or where ever you expanded the archive)
- Run “adb push Superuser.apk /sdcard/Superuser.apk“
- Run “adb push su /sdcard/su“
- Run “adb push busybox /sdcard/busybox“
- Run “adb push exploid /sqlite_stmt_journals/exploid“
- Run “adb shell“
- Run “cd sqlite_stmt_journals“
- Run “chmod 755 exploid“
- On your phone, navigate to a screen where you can switch wifi/bluetooth on/off easily (settings, or a home screen with a widget)
- IMMEDIATELY after executing the next step, toggle wifi or bluetooth off and back on
- Run “./exploid” and follow directions on screen. Once this completes you’ll be back at a shell prompt.
- Run “rootshell“. You’ll be prompted for a password.
- Type in password “secretlol” and press Enter then you are root! (You’ll know because your prompt will now be a “#” instead of “$”)
- Run “cp /sdcard/Superuser.apk /system/app/Superuser.apk“
- Run “cp /sdcard/su /system/bin/su“
- Run “cp /sdcard/busybox /system/bin/busybox“
- Run “chmod 4755 /system/bin/su“
- Run “chmod 4755 /system/bin/busybox“
- Run “rm /system/bin/rootshell“
- Run “exit” to drop from root to a non-root user shell (on phone still)
- Run “exit” to drop back to your machine command prompt (instead of phone)
To Confirm root is established:
- Run “adb shell“
- Run “su” (now you should see the # sign which indicates you are root)
- Watch your screen so you can allow Superuser root access.
We write about Android, Apple, iPhone, iPad, Android, Open Source and latest in Tech @taranfx (Twitter) or subscribe below:
