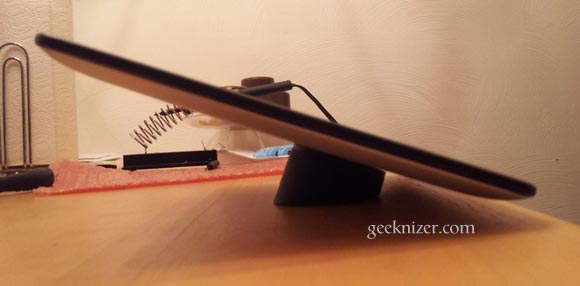
DIY tutorials open up a world where you can do magic by spending only a fraction of amount to build an equivalent of a product available in the market. You can Build a Wireless Electricity circuit using commonly available electronic components for an absolutely cheap set of components.
We love wireless, and Wireless Inductive electricity/charging is the most exciting thing around since the discovery of Electricity and wires. These days, few gadgets ship with Inductive charging capability, however, you make them your own. If you’re an electronics guy, its fairly easy to port Inductive wireless charger to another hardware, without drilling hole in pockets.
A modder took his Android ICS Tablet (Gemei G9T, a 9.7″) and attached it to an inductive charging hardware. The inductive charging hardware comes from Palm HP Touchstone phone. This makes the whole process easy by letting you interface with the tablet’s electronics, but physically placing the coil.
How to Add Wireless / Inductive Charging to Android Tablet [DIY]
Experience level: High
What You Need:
- Android Tablet
- Opening toolkit – guitar pick, screw driver
- Inductive charging kit from Palm Touchstone phone or any other device.
How to:
- Use screw driver and Guitar pick to losen the back pane of your Android Tablet, then remove the screws and tug the case off of the tablet. Be patient while you do this, donot scratch the backplate.
- Desolder speaker or battery thats attached to the backplate. (Not all tablets have them)
- Decide the position where you would like to have the coil placed. This area would be magnetically connected to the charging dock.
- Take Palm Touchstone dock and cover. Carefully remove the foil cover and the coil. Then move the PCB and magnets.
- The magnets are the first to be positioned on the tablet’s back plate. If your Tablet’s back cover (metal or plastic) is too thick for them to hold well, use a Dremel to grind away just enough material for a strong connection.
- If you’re having a plastic backcover, you shouldn’t normally have to do this. If you have it, the metal will shield the magnetic fields. But for this to work, the coil needs to get those magnetic fields, so you will have to cut a hole in the case the same size as that coil.
- Later, cover the area with liquid electrical tape to prevent shorts.
- Use multimeter to check if it works when held against charging station
- Now on to Tablet’s board. You’ll have to detach and flip the main board. For this you’ll have to unplug jumper and ribbon cables.
- Turn board upside down and locate +ve, -ve terminal for micro-usb connector.
- Twist the cable to avoid external magnetic fields and back emf.
- Tuck two jumper cables and attach that to inductive coil on the back cover.
Checkout the Full detailed video process after the break:
The video has enough details about everything you should care about. Although mod is easy enough to be applied even to iPad, we don’t recommend unless you know what you’re doing.
Happy Modding!
We write latest and greatest in Tech Guides, Apple, iPhone, Tablets, Android, Open Source, Latest in Tech, subscribe to us @geeknizer on Twitter OR Google+ or on Facebook Fanpage:
loading...
loading...

