We’ve written lots of Hackintosh Guides all the way from OS X 10.5 to 10.7, and here we are back once again with best of the line OS X Lion 10.7.2 easy guide
Our previous guide: Install Mac OS X 10.7 Lion on your PC was rather difficult for beginners, this one is going to be way more simpler, thanks to the UniBeast.
UniBeast + MultiBeast makes thing smooth and easy. You can Clean Install OS X Lion 10.7.2 or update Snow Leopard 10.6.x to 10.7.2.
Pre-requisites:
All you need is:
- Existing Mac OS X – For preparing bootable USB. You can borrow your friend’s Macbook or even do it via any hackintosh.
- 8GB or Larger USB pen drive
- OS X Lion Install application (via Mac App Store) OR Official Apple OS X Lion Install USB drive. (Buy it at apple.com or Apple store)
You can easily pirate an OS, but we recommend you buy OS X Lion, that ways your hackintosh becomes semi-legal.
Update: We’re trying to make this OS X Lion guide compatible with OS X Lion 10.7.3 Update. Stay tuned.
How to Install OS X Lion 10.7.2 on PC [Laptop, Desktop] using USB
Step 1. Creating Bootable USB drive
I. Formatting your USB pen drive:
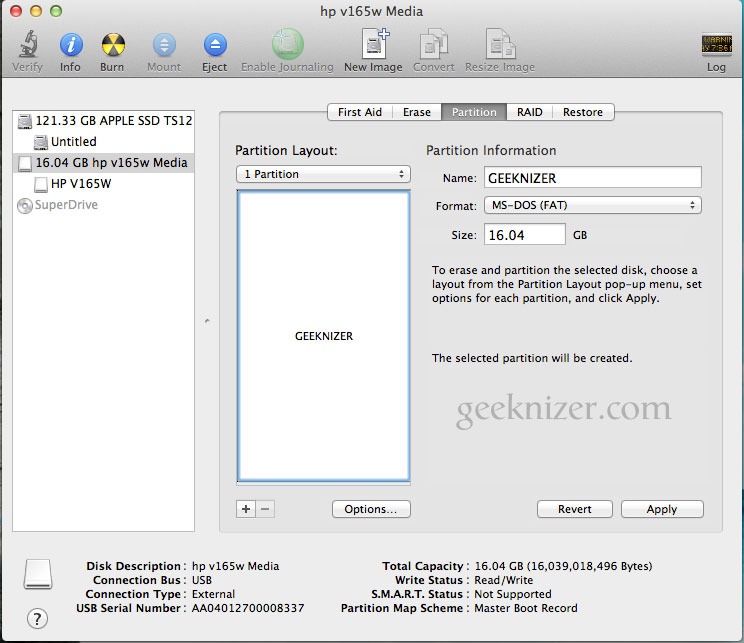
- On a Mac OS X, insert blank 8gb usb drive, Open Disk Utility (Applications > Utilities).
- Select your USB drive on left and click Partition tab on the right. Click Current, and choose 1 Partition.
- Give it a name e.g. Geeknizer.
- Click Options, select Master Boot Record and hit Ok.
- Navigate to Format tab and choose Mac OS Extended (Journaled) and Apply, then Partition.
II. Modding OS X Lion with Unibeast.
If you’re using Install Mac OS X Lion Application (downloaded via App Store), make sure its available in Applications folder. In case you’re using OS X Lion USB drive, make sure its connected and mounted.
- Download UniBeast and run it. (You’ll need to register on tonymac forums)
- Proceed normally, when asked for destination choose your USB drive (geeknizer) that you formatted earlier.
- Choose your installation type: Mac App store Install Mac OS X Lion or Thumb drive. If you will install this on a Laptop, check mark third option “Laptop Support” too. Click continue, then Install.
Sit back and relax while your USB pen drive (geeknizer) is prepared for the Hackintosh.
Step 2. Installing OS X Lion on PC
Go to the PC you would want to hackintosh.
I. Preparing BIOS:
- While booting, press F12 (or f10 on older PCs) to enter BIOS settings.
- Go to boot priority and set USB-HDD to highest.
- Set HDD SATA mode to AHCI.
- Set ACPI to S3
- Set Xtreme hard drive to Disabled.
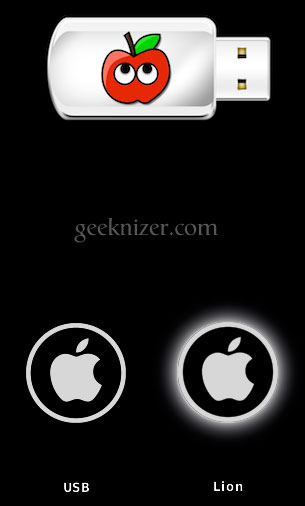
Now reboot your PC with geeknizer USB plugged in and you would be booted into Chimera boot screen that lets you boot from USB drive. For booting into installer, you may need to enter following flags.
- Nvidia cards are supported by default. For AMD Radeon 6670 type – “PCIRootUID=0”
- For Unsupported graphics type – “GraphicsEnabler=No”
- Boot in single-suer mode – “-s”
- Boot in verbose mode – use this if you face any issues, this will show detailed error messages that you can post in comments section at the end of the post – “-v”
- Boot in Sage mode – Try this if you fail to boot into installer – “-x”
II. Preparing Hard disk partition for OS X Install
When you see the installation screen, follow the following steps, skip them if you’re upgrading from Snow Leopard.
- Warning: This will erase all data on your HDD.
- Open Disk Utility ( Menubar > Utilities). Select your target Hard disk on left > Partiton tab > Choose 1 Partition > Options > GUID Partition Method.
- Give it a name e.g. LionGeek, Format > Choose Mac OS Extended (Journaled)
- If you wish to install side-by-side with windows installation, create a new partition instead and format it with Mac OS Extended (Journaled). However, using HDD exclusively for OS X Macintosh installation would avoid a lot of trouble.
III. Proceeding with the Installation
- Proceed with Installation and when Installer asks you the location to install Lion to choose LionGeek.
- When installation completes, restart system.
IV. Booting the First time
- At this point your LionGeek is not bootable, boot from geeknizer USB drive and choose LionGeek when prompted.
- Download Multibeast, the one stop solution to fix Boot, all drivers for Audio, Graphics, Network. It also includes system utilities to repair permissions and more.
- Go to DSDT database and Download DSDT corresponding to your motherboard. It would download a .aml file, move it to Desktop.
- Run MultiBeast’s UserDSDT, select the .aml file and proceed with the install. Reboot when done.
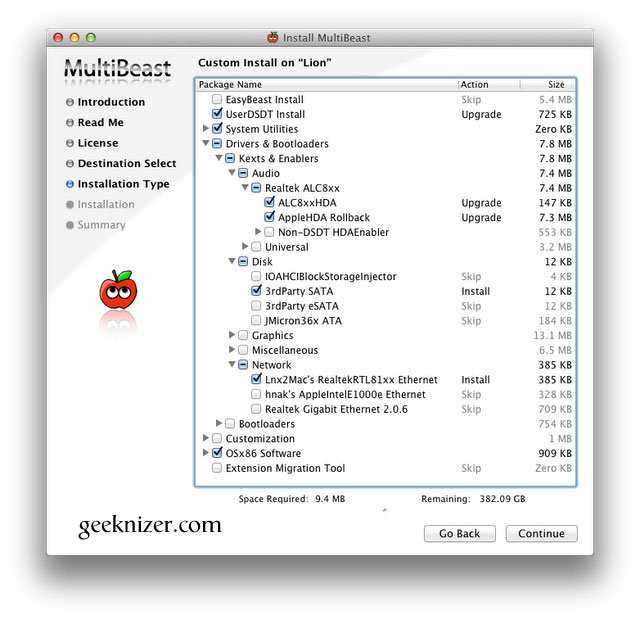
- Run MultiBeast and install any other drivers you may need to make your hardware peripherals like Sound, Network to work.
You should now have a fully self-booting OS X Lion installation.
Updating Hackintosh to 10.7.3 & later
One thing to remember is that updating to pretty straightforward and you won’t run into issues, but it’s good to check tonymacx86’s blog when updates are released to see what you’ll need to do. In most cases you’ll just download the latest update from Apple directly (rather than running Software Update), remove Sleepenabler.kext (provided you’re using it), and then re-install it and any overwritten drivers using MultiBeast.
In most cases, the only driver you’ll have to reinstall is the AppleHDA Rollback, because that driver needs to be installed directly into your System Library where OS X makes changes. If you made any edits to graphics drivers, the update may overwrite them so you’ll need to make those edits to the new, updated drivers as well.
Download the updater directly from Apple rather than Software update. If you ever get into trouble, restoring from a backup is considerably less time-consuming than going through this entire process again from scratch.
Its easy to be lost somewhere in the middle, feel free to ask questions via @geeknizer or +Geeknizer or in the comments below. Thanks to Tonymac for making it possible.
We write latest and greatest in Tech Guides, Apple, iPhone, Tablets, Android, Open Source, Latest in Tech, subscribe to us @geeknizer OR on Facebook Fanpage, Google+.
loading...
loading...

It’s worth noting that most PCs are not fully compatible with Mac OS X. If you want an easy installation like the one in this guide, you’ll probably have to built your own PC. Finding a prebuilt computer that’s Hackintosh compatible can be pretty tough. http://www.macbreaker.com/2012/01/is-your-computer-hackintosh-compatible.html
loading...
loading...
@geeknizer:disqus Thanks a lot for your tutorial, but you didn’t choose all options in MultiBeast. Now how do i know what to choose?thanks a lot
loading...
loading...
Nice suggestion provided by you. It help lot of people who need to MAC OS but can’t afford Apple’s Laptop. This is very good to Tips did it work in All-in-one desktop computer?
loading...
loading...
NTFS-fs error (device /dev/disk0s2, pid 313): ntfs_pagein(): Failed (cluster_pagein_ext(). error 5
loading...
loading...
This is the error message i get when running in verbose
loading...
loading...
I Get that too
loading...
loading...
Nice work ripping off tonymac’s site
loading...
loading...
this has never worked under osx10.5.8 to set up usb key! nothing 100% works im trying to set up gigabyte ga-z68a-b3h-b3 !,,
loading...
loading...
Format Pen in a Windows PC with MAC Drive
loading...
loading...
It is possible to make a dual boot with this tutorial?
loading...
loading...
Nooby here. I have a gigabyte H61n USB3 MB with the F4 bios (that’s what is shipping now). 4GB of RAM, a seagate momentus 500gb HD. I have tried an rboot and a unibeast approach to getting 10.7.3 to load and get the same results with each. I have my HPET set to 64 bit and ACPI set to S3 and HD set to AHCI. I get to the Chimera screen using either rboot or the unibeast and select my 10.7.3 installer created either with xmove or unibeast from the app store installer for 10.7.3. I get the white screen withe the apple, the sundial spinner goes for about 30 seconds then hangs. After about 3 minutes I get a KP type screen that says I need to power down and reboot. Can’t get passed this no matter what I try. Can anyone suggest some things to try?
loading...
loading...
same problem…different specs…
loading...
loading...
works in AMD processor??
loading...
loading...
I boot in verbose and it says Still waiting for root device !!! What should I do?
loading...
loading...
mac app store doesnt work in my case. please help
loading...
loading...