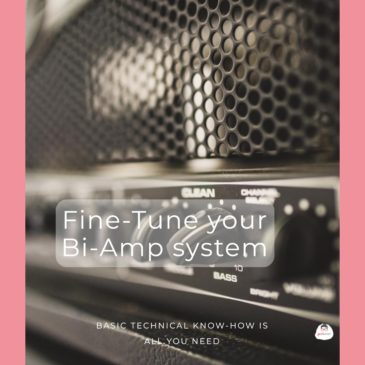
- Bi-Amping separates high and low frequencies for more precise sound.
- Use affordable amps and DIY crossovers.
- Choose amps and speakers that offer the best value.
- Keep safety in mind while bi-amping.
Immersing yourself in a clear and refined sound makes every note feel like it’s being played live right before you. Audiophiles strive for high-fidelity sound. Ordinary folks often associate high-quality audio with a hefty price tag. The truth is, the hi-fi audiophile experience isn’t exclusive to those with deep pockets. Bi-amping your speakers can lead you to a new level of sound fidelity, and you can definitely get it on a budget. Read on to let your bird of imagination fly!
For the uninitiated, bi-amping is a technique that uses two amplifiers hooked up with one speaker. One amp powers the high-frequency audio (tweeter), and the other powers low-frequency audio (woofer). Such a setup assures more power and more precise frequency separation, resulting in a more dynamic and responsive audio experience.
Components of a budget Bi-Amping system
Here’s how you can get started. You need two amplifiers and a set of speakers that can work with bi-amping. Don’t worry; you don’t need to go outrageous with the setup. The goal is to carefully select components that provide the best bang for your buck. Once you are at your local audio equipment shop or searching for audio components online, you should look for amplifiers that balance cost with quality. Make sure your speakers have separate inputs for high and low frequencies.
For those interested in a deeper exploration of wireless on-the-move audio equipment and quality, take a moment to read our in-depth review of Bose QuietComfort Ultra earbuds.
Step-by-step guide to Bi-Amping your speakers on a budget
To be fully transparent, you need some basic technical know-how, but bi-amping is a straightforward process. Here are the steps you need to follow to get your system up and running:
- Connecting the amplifiers – Connect each amplifier to its respective speaker input. Make sure you connect high frequencies to one, and low frequencies to the other.
- Installing the crossover – A crossover will separate the audio signal into high and low frequencies before it hits the amps. It can either be a dedicated piece of hardware or a software solution on a digital signal processor.
- Calibrating the system for optimal output – You could get a sound meter to take performance metrics to the next level. Otherwise, use your ears to adjust the amplifiers so that high and low frequencies are balanced to your liking.
For those intrigued by tech apps, our article on smartphone battery drain showcases innovative apps and methods your smartphone battery use can be optimized.
Fine-Tuning and Troubleshooting
Once your system is completely set up, you must fine-tune your audio sounds to your environment and preferences. Get tweaking with the crossover points and volume levels to smoothly transition between the bass and treble outputs. Experimenting with various permutation combinations until you find the perfect sound is highly recommended.
Don’t worry if you hit roadblocks. Troubleshooting is part of the process. Have faith and carry on! Common issues include a lack of balance between frequencies or a humming sound, which usually indicates a grounding issue. You must check all physical connections. Ensure there’s no signal interference, and verify that all components are compatible and functioning as they should.
Acoustic challenges – overcome your listening hurdles
The acoustics of your room play a pivotal role in improving your overall sound experience. A great bi-amping setup may fail at a few points if your room’s characteristics detract from the sound quality. You may want to consider the following tips to optimize your listening ambiance:
- Positioning your speakers strategically – Speaker location can directly affect the bass response and soundstage. Again, experimentation is recommended with different placements to find the sweet spot in your room.
- Managing acoustic reflections – Did you know? Hard surfaces reflect sound, which can cause echo and blur the audio. Materials like carpets, curtains, or acoustic panels can help manage reflections.
Be a smart buyer – Build your bi-amp system on a budget
Bi-amping on a budget isn’t just about spending less. It’s more to do with being a smart spender. Use the resources available, like online forums, second-hand markets, and DIY guides, to make informed decisions. Remember, resourcefulness and a willingness to learn can lead to results that rival far more expensive setups.
The joy of DIY Bi-amping
You should now have a functioning bi-amped system that enriches your audio experience without breaking the bank. This journey is about the satisfaction of DIY, the knowledge gained, and the personalized sound achieved.
We invite you to share your bi-amping adventures and join a community that values high-quality sound on a budget. Let your experience inspire others to embark on this rewarding audiophile journey.
loading...
loading...


