Xposed is a super popular Android based framework which provides for simple and easy patching of android system with useful utilities. More like adding features onto your existing ROM without having to install separate Apps for missing features. You can also modify existing system Apps as well as installed Apps using the Xposed framework. You don’t need to install a new ROM to get certain features missing in your existing ROM. The list of App modifying add-on features is long and stretches further everyday.
The framework is modified to fit-in with every new Android ROM update. And it works pretty well is almost all types of Android ROMs, Stock as well as customs.
Installing the Xposed framework and thereby adding / patching new features onto the ROM and installed Apps is easy.
Pre-requisites to installing Xposed:
- You need an android device with Root permissions (Suer User)
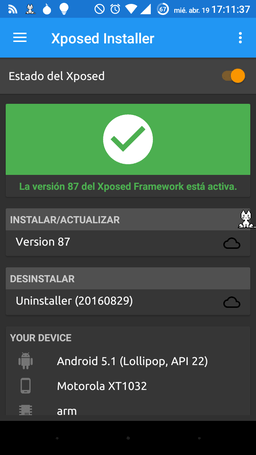
- Any 5.0+ Android ROM installed on your device
Steps:
- Visit XDA Developers forum to download Xposed APK installer
- Install the .apk file like any other App (allow permissions to install from unknown sources)
- Once the app is installed navigate to the “Framework” menu
- Hit the “Install/Update” button to choose desired features form the list
- Obviously “Root Access” permissions need to be approved by you
- Then watch Xposed do its magic and restart the device
- Check the efficacy of your actions by going to the specific App that was targeted for modification
You can also download and install .zip file and flash it in Recovery mode.
What are the best Xposed features
Xposed works by way of identifying features as modules. It basically patches the system or installed Apps by patching modules onto them and thereby modifying their functionality, which are otherwise restricted by the App developer. Most favorite Xposed modules include:
Greenify
We recommend Greenify because it gives full control on how your device manages its battery usage. This App can be installed in non-root devices too, but the its real functionality comes to play in Root environments. You can literally suffocate several Apps and enhance battery life easily by more than 1.5 times (this is still on the lower side). You can exercise control on which Apps work and which do not when your phone screen is off. So no more battery drain with background activity of Apps and you can curtail the network data usage too.
Amplify Battery
We are a big fan of Xposed battery management capabilities. So the second most recommended module again pertains to enhancing battery life. Amplify Battery start working as soon as it is installed. Users can certainly modify and customise battery usage by the system, however the inbuilt settings kick in as soon as the module is patched. Users can check the battery usage by looking at individual App or system module’s battery activity.
XUIMod
If you are bored of your system User Interface and are looking for a refresh, XUIMod is there for you. It customises the system UI with fresh animations added onto your lockscreen and menu transitions. You can also modify clock, battery and notifications using XUIMod. It helps make your custom ROM UI much more customised. You can always monitor and control battery usage using the above mentioned mods.
NeverSleep
Ever faced a situation where you want to keep your screen awake while you run your desired App? You might be reading an ebook and screen just keeps turning off. Going to system settings and changing screen awake time gets annoying in situations like these. With NeverSleep you can custom control screen awake times for each of the installed Apps.
A word of advice here, do check feasibility of the selected module if it works with your existing Android ROM. A few of features are not compatible with a few of ROMs. That being said, you can find full list of Xposed modules here.
How to patch Xposed Mods onto your ROM
So now we’ve installed Xposed framework and have discussed a few popular mods available on Xposed. Here’s how you install these mods:
- Fire up your Xposed App
- Throught he menus go to “Download”
- Select your desired mods from the list
- You can select all the mods you want in one go, don’t need to come back time and again for different mods
- Select the mod version you wish to install, usually the latest is the best, may be unstable at times
- Go to Menu and hit Modules, this will download the mods your selected in the previous steps
- Select Activate and Xposed might as you for a restart
Time and again Xposed has been compared with its competitor Magisk. Although Magisk appeared late on the scene but it has some really useful features. Whats more, you can install both Xposed and Magisk together to get best of both the worlds.
There is one big issue with Xposed. As it modifies files on the Android system, it tends to trigger Google SafetyNet. Which further leads to apps like Google Pay and Netflix and few others to stop working altogether. To fix this SafetyNeybypass, install these 3 .apk files and go to Xposed manager and activate the mods. This should let you make full use of Xposed without compromising on important Apps.
On the sidelines we would also like to discuss Xposed’s competitior, Magisk. Xposed has lost lot of ground to Magisk. Unlike Xposed, Magisk does not work in a mod-ular fashion. Magisk does not modify the Android system, hence does not trigger SafetyNet related issues.
Xposed can be installed as a Magisk module, however vice versa is not true. This also perpetrates that Xposed, when installed as a Magisk module, can also work without altering the system.
loading...
loading...