Rooting means total freedom. No restrictions from your OEM rules, your thoughts or actions can stretch your Android OS to its limits. After rooting you have permission to do anything to any file any place in the system.
Rooting for an individual is different for the user. Some do it just for the fun of it, some do it to realize full potential of hardware of their device. You can do away with unwanted Apps forced upon by your phone manufacturer or remove system Apps that tend to corrupt your system thus making it more stable.
Steps to root your Google Pixel c or Google Nexus Phone or Tablet are as follows:
- First and foremost important step is to take complete backup. Make sure you don’t loose any important piece of data in case the rooting process leads to undesirable results
- Needless to say, you are doing this at your own risk and you understand the probably undesirable outcomes of rooting like bricking of your device
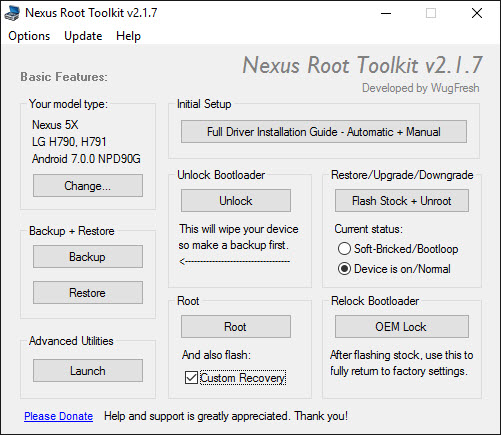
- Now all the requisite things said and done, lets do it. Go to WugFresh website and download the latest copy of Nexus Root Toolkit. Here is how the main screen looks like

- If you have the right drivers installed for your device, Nexus ToolKit will identify your device
- Once your device is detected properly, choose the image you wish to deploy
- Nexus Root Toolkit automatically downloads the desired ROM. In case you wish to deploy a certain ROM unavailable in the drop down list, you can manually choose the ROM from your hard drive.
- Once selections have been made, hit the “Flash Stock + Root” button in the right column.
GD Star Rating
loading...
loading...
GD Star Rating
loading...
loading...

